Category: Free Course

  • Save your time with Schedule Post

    If you’re a social media manager, you know how time-consuming it is to manage several social media accounts for a business.

    But you don’t have to scramble between platforms and browser tabs to get your job done. A good social media scheduling tool can centralize your work and save you a lot of time and effort.

    The benefits of social media scheduling tools

    1. Save time. Scheduling tools help you save time by allowing you to prepare and schedule content days (or even weeks) in advance, so you can focus on other parts of your business.

    2. Stay organized. These tools help you keep a bird’s eye view and easily review your scheduled social content across all the platforms you use.

    3. Reduce mistakes. When you schedule content in advance, you have more time to proofread and review the posts before they go live.

    4. Post at optimal times. Most social media scheduling tools suggest the best times to post content.

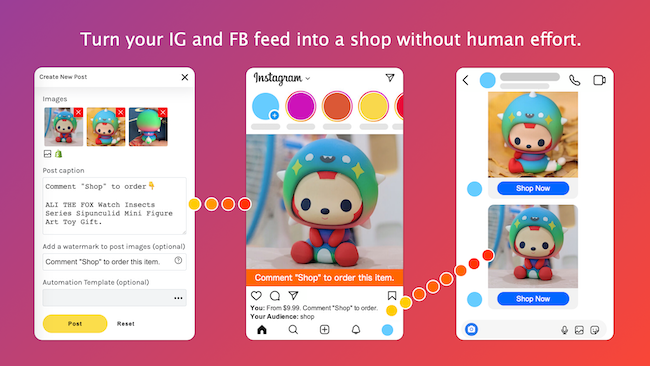
    Biobiogo social media post scheduling tool

    Biobiogo is an affordable social management platform, but is for all size of businesses, freelance social media managers, social media and marketing teams, startups, content creators and individual users.

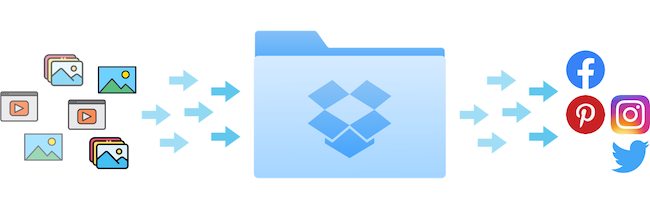
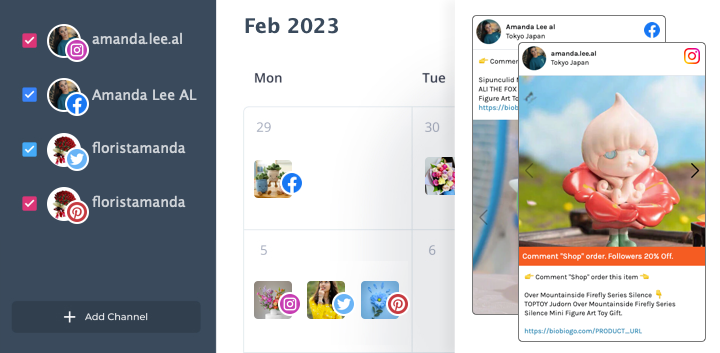
    With Biobiogo, you can schedule posts for Facebook, Instagram, Twitter and Pinterest from one intuitive dashboard. Think of all the time you can save not switching between many apps to post content!

    Schedule your first post

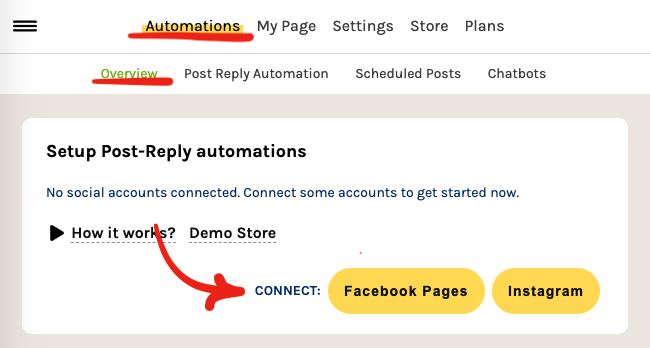
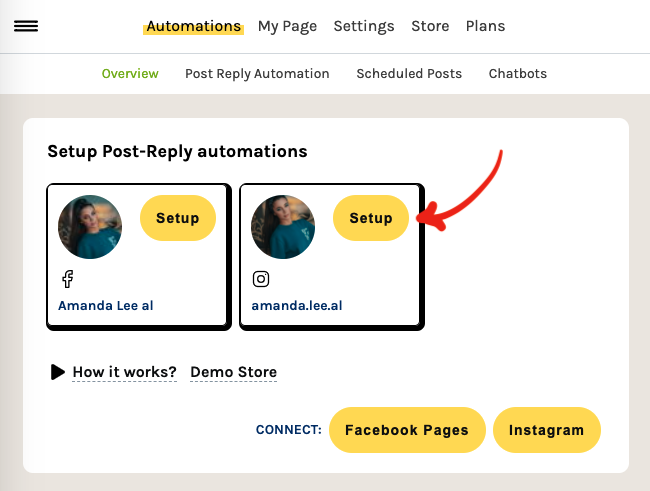
    Once you’ve logged in and connected your social accounts to Biobiogo, this is how to schedule posts using the app.

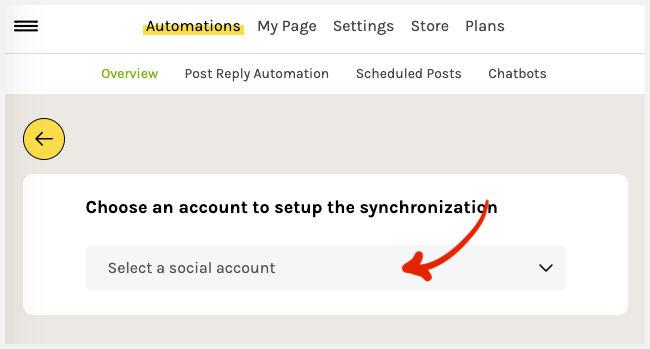
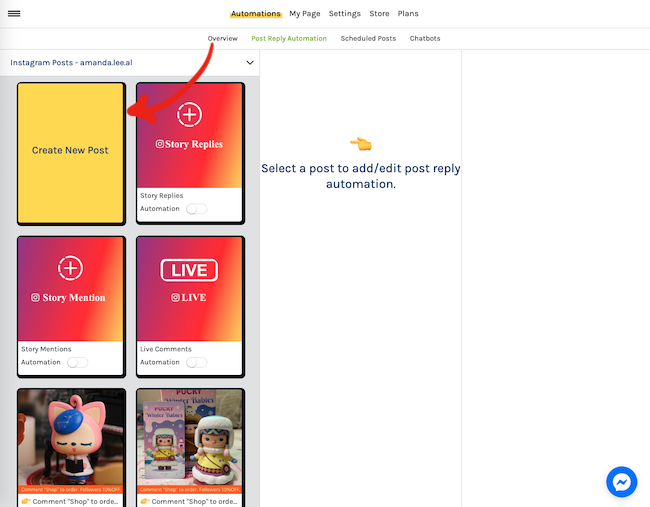
    1. Go to Scheduled Posts page by clicking on Automations, click Scheduled Posts on the top menu bar, and Click on the + button at the right bottom of the screen.

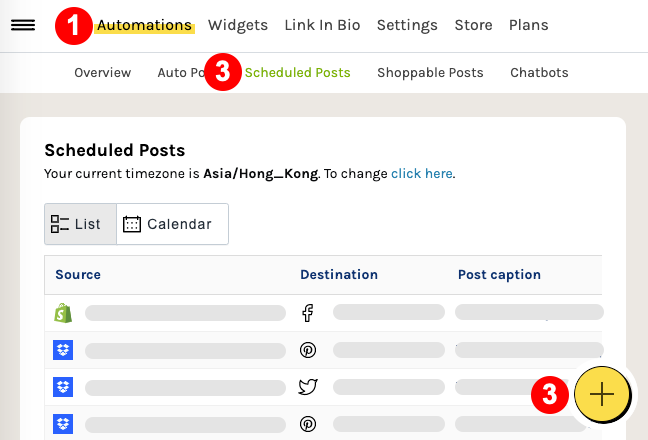
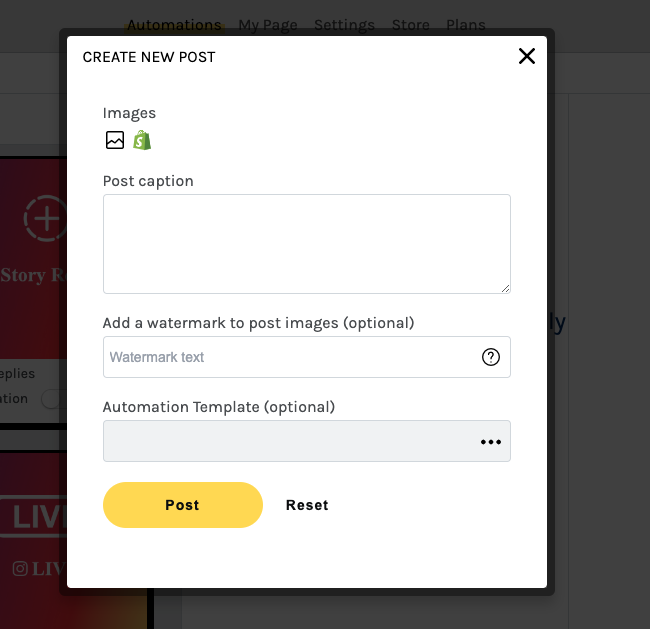
    2. Then you will be redirect the post editor. In this page you will be able to design and schedule the post to all platforms and social accounts you have connected to Biobiogo.

    Here are what you are able to fill in the post editor:

    Destination accounts: where your post should be posted to

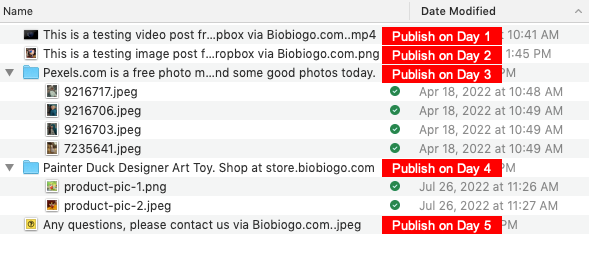
    Medias: photos and videos will appear on your posts

    Post type: image, video, carousel & slideshow (created from images)

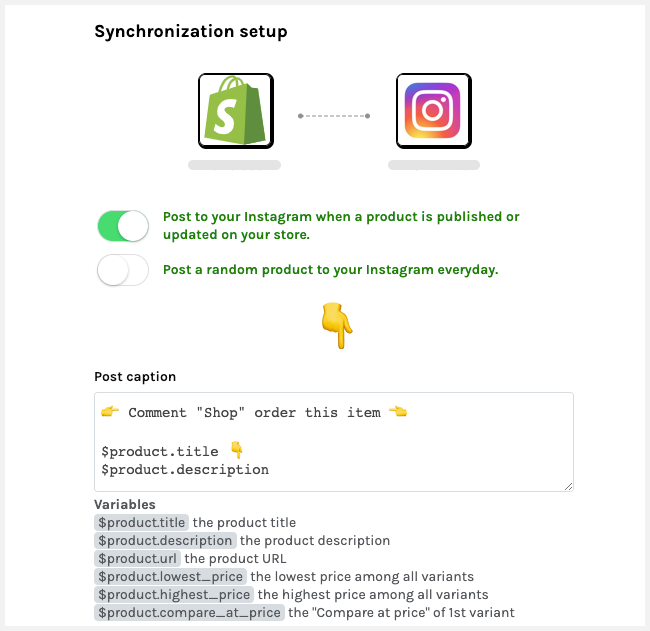
    Post caption: text that will appear on the posts

    Location tag: tag a location to the post

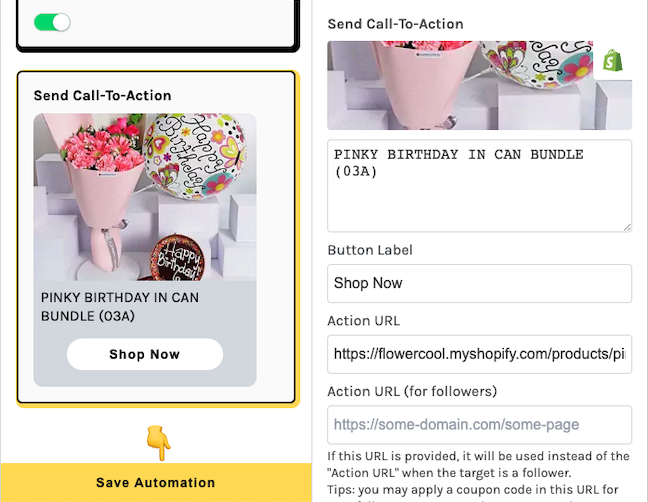
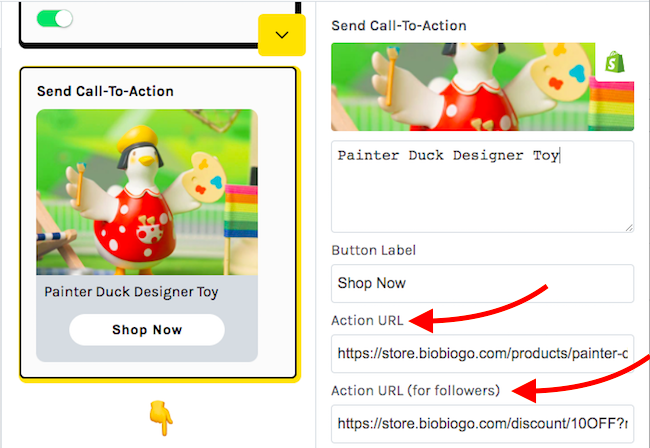
    Product URL: a URL will appear on the post, can be any kind of web links

    Params to the Product URL: params to add to the URL, it can help you to track the traffic source.

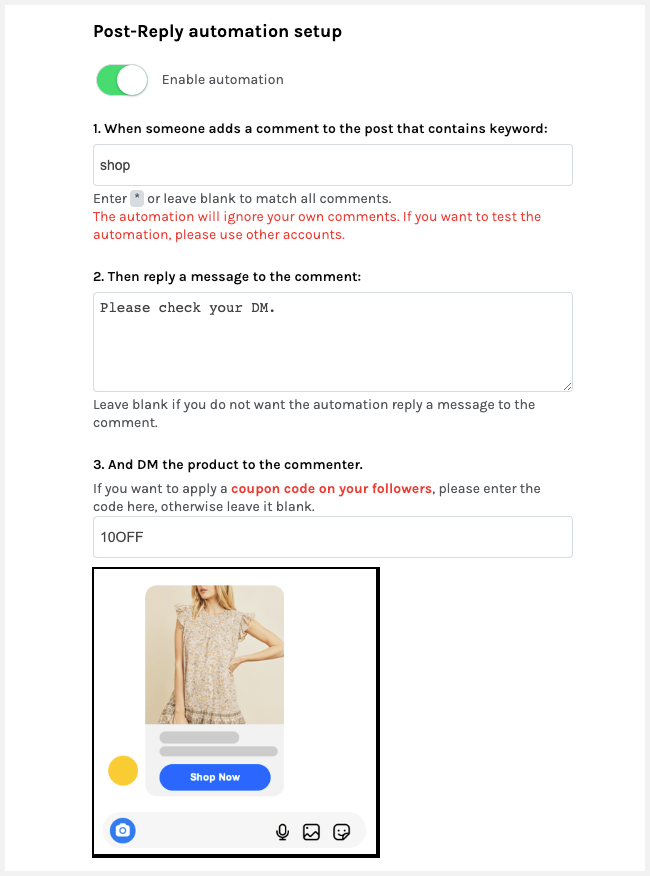
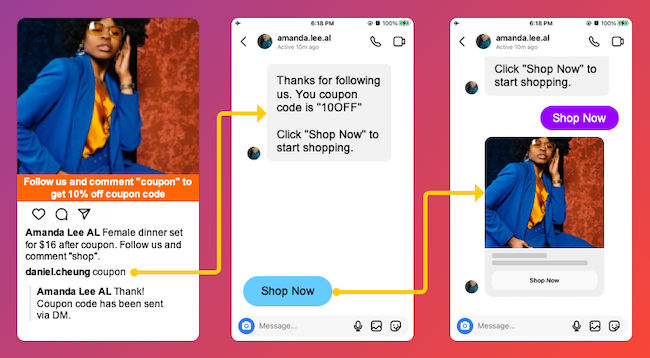
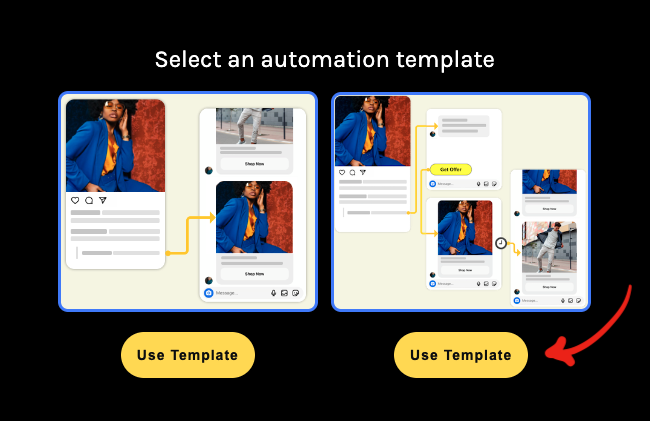
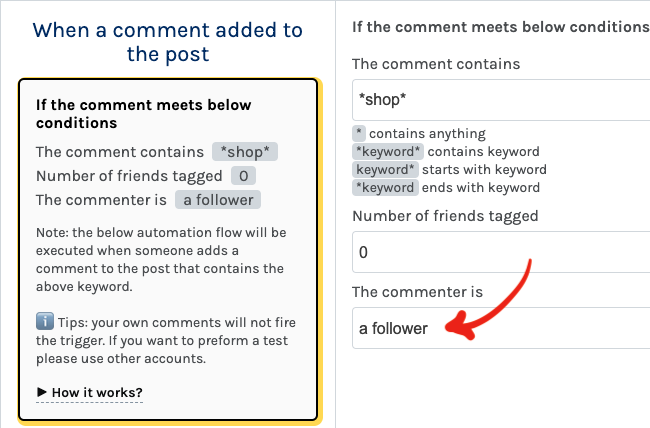
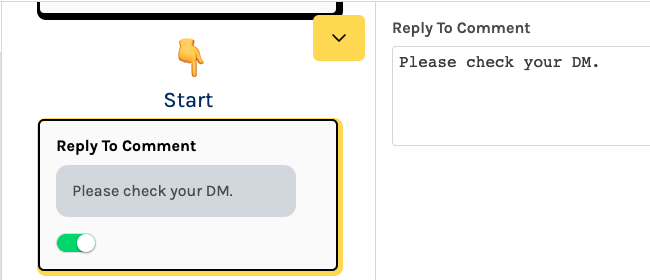
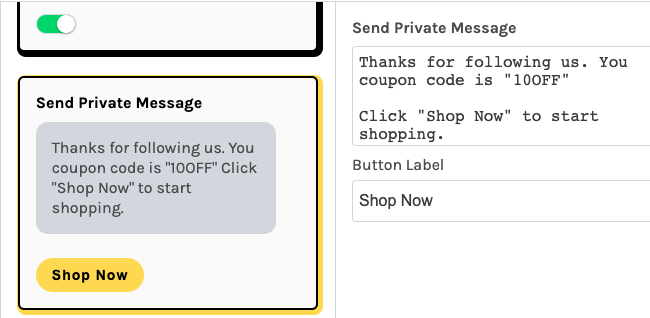
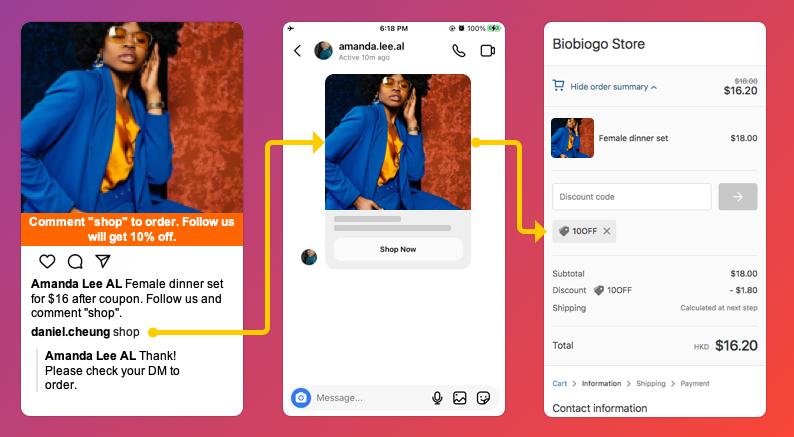
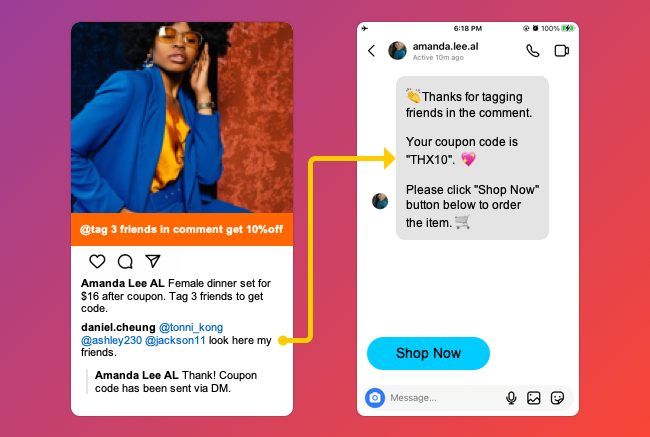
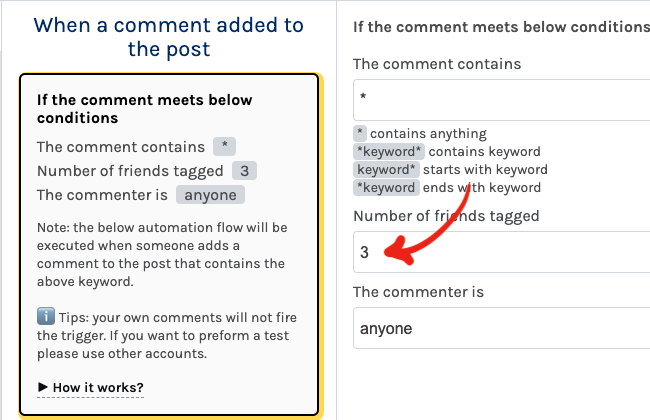
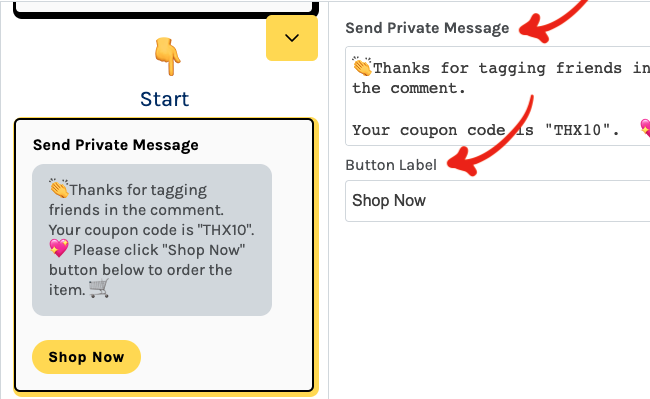
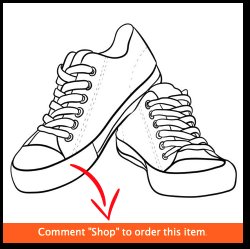
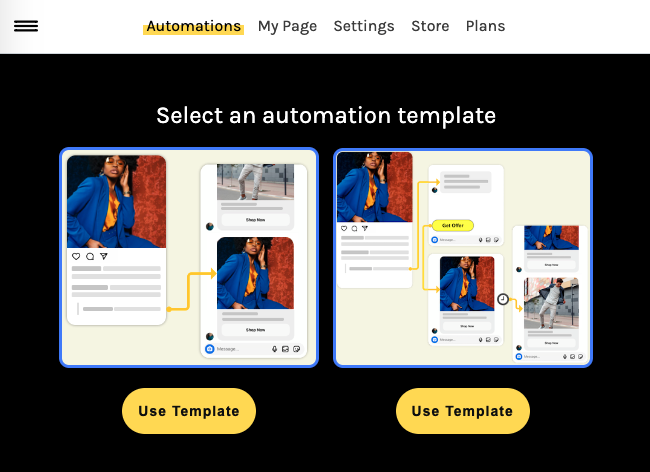
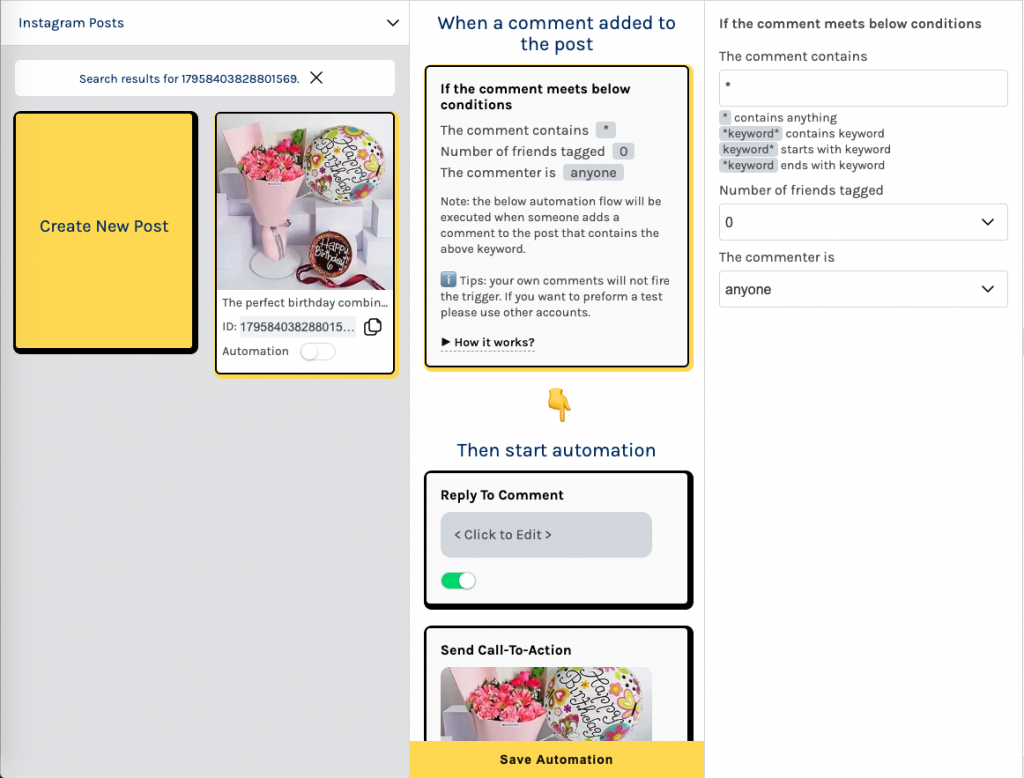
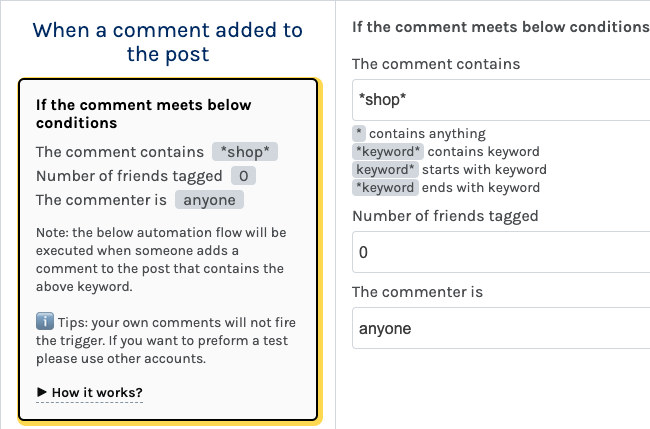
    A shoppable automation: a automation sells products direct from your post

    Edit scheduled post

    Don’t forget that you can edit individual posts afterward. To do so simply go to Scheduled Posts page by clicking on Automations, click Scheduled Posts on the top menu bar.

    Here is all. If you have any further questions, you are always welcome to contact our customer service to get more information.

    Go and Schedule Your Posts Now >

  • Synchronize your medias to your social accounts from Dropbox

    Do you know that you can simply put your media files like photos and videos to your Dropbox folder and these files can be post to your social accounts like Facebook, Instagram, Twitter and Pinterests?

    With Biobiogo Auto Post you can enable this feature within minutes. Here is how you can do it.

    1. Connect your Dropbox and social accounts

    To connect your Dropbox and social accounts, login your account and go to https://biobiogo.com/my/social-connect/overview or click Settings on the top menu bar on your account.

    2. Create your Auto Post campaigns

    To create an auto post campaign is very easy. Click Automation, then click Auto Post on the top menu bar, then you will be able to create your campaigns.

    During the campaign creation, choose your Dropbox account as the data source, and you will also required to choose a social account as the destination where your media files will be posted to.

    After choosing your data source and the post destination, you will be redirected to the campaign editor where you will edit the campaign details.

    While editing your campaign details, you will be required to enter the Dropbox folder name where your media files are stored. Please note that the folder path prefix /Dropbox/Apps/biobiogo/ is fixed. For example your enter a name My Photos, the full path will be /Dropbox/Apps/biobiogo/My Photos. Files put into this path will be posted to the destination automatically from day by day.

    3. Organize your files in the Dropbox folder

    Please note files in the Dropbox folder will also need to be well organized. As detailed below.

    Accepted file formats: JPG, JPEG, PNG, GIF & MP4

    A single photo/video post: you will need to put the file to the target path directly for example /Dropbox/Apps/biobiogo/My Photos. The file name will be the post caption.

    Carousel post: you will need to put the carousel photo into a subfolder, for example /Dropbox/Apps/biobiogo/My Photos/These are my todays work. The subfolder name will be the post caption.

    Please refer to below screenshot.

  • Busy posting your Shopify shop products to social platforms?

    Spending a lot of time posting your Shopify shop products to your Facebook and Instagram feeds?

    Biobiogo Shopify shop synchronization feature helps you post your products to your Instagram and Facebook pages automatically.

    And it will also turns your Instagram and Facebook feeds into a direct shop where people shop and pay without leaving the apps.

    Watch the following video to see how your shop will be working on the Instagram and Facebook apps.

    There are only a few clicks to enable the feature as long as you have the Instagram Shop & Facebook Shop app installed to your Shopify shop.

    Step 1

    Launch the app from your Shopify admin panel, click Automations, click Setup button on the Product Synchronization block.

    Step 2

    Choose a social account you wish to synchronize your products to.

    If you have more than 1 social account connected, you can repeat the step to setup the synchronization to synchronize your product to multiple social accounts.

    Step 3

    Setup the synchronization according your needs, you can turn on both or either one of blow triggers.

    1. Post the product to your target social account when it is updated or published.
    2. Post a random product to the target social account daily.

    Step 4

    Setup the shoppable automation.

    Now is all done. Try to update a product on your Shopify shop to see the magic.

  • Reward your store visitor as they follow your Instagram?

    Instagram has become a cornerstone of many brands’ social presence, driving profitable traffic to landing pages, growing conversions, and building an engaged audience.

    Real followers can help your brand to reach larger audience and close more sales. Real followers that like, comment and engage with your content.

    Getting real followers is not an easy thing to do, rewarding a coupon to the visitors when they start following you is an attractive idea to get the job started.

    See the following graphic to learn how Instagram Shop & Facebook Shop app helps to encourage your store visitor to follower your Instagram and engage your posts.

    To setup a post work like the above graphic is much simpler than you think.

    All you have to do is

    1. Create a Shoppable Post (how to do it?)
    2. Config the Automation to Work with Your Followers
    1. Create a Shoppable Post

    Creating a Shoppable Post only requires a couple of click as we have introduced our Shoppable Post in a previous post, click here to learn more.

    2. Config the Automation to Work with Your Followers

    Step 1

    While setting up the automation on the shoppable post, you will choose the second one as your automation template.

    Step 2

    In the Condition component, choose a follower from the select box The commenter is.

    Step 3

    In the Reply to Comment component you may set a message like “Please check your DM” as we will DM the coupon code to the commenter.

    Step 4

    In the Send Private Message component you may set a message that contains the coupon code as this message will be sent to the commenter’s DM inbox, and also define the Button Label, for example “Shop Now” as there will be a button accompanied with the message. Like the following graphic.

    Step 5

    Finally in the Send Call-to-Action component, you will set a multiple media message which will be sent to the commenter’s DM inbox when the commenter click on the “Shop Now” button on the above message you have just set. Like the following graphic.

    The last thing is click on the Save Automation button to deploy the automation the post you have created.

    Go and have a try now.

  • Apply discount to your Instagram followers automatically

    Even though growing followers on Instagram is not an easy job, but it does not mean that there is no better ways.

    Rewarding your followers a discount can attract more buyers and customers to follow your Instagram and also preventing from loosing them.

    To deal with the case with a shoppable post is a piece of cake, look at the following graphic to see how it works.

    Now all you need to do is to offer 2 different product URLs.

    1. A common product URL, for non-followers
    2. A product URL which a discount code inserted into, for followers (click here to learn inserting a discount code into your Shopify product URL).

    While setting up the automation on the shoppable post (how to create a shoppable post?), you will see 2 different Action URLs in the Send Call-To-Action component.

    Action URL: the primary URL, if there is no Action URL (for followers) set, this URL will be used to send to all buyers. This URL will be fill automatically if you click on the Shopify Icon to fill the component from your Shopify Store.

    Action URL (for followers): the URL will be used to send when the buyer or customer is a follower of your Instagram, if set.

    If you wish to offer a discount to your Instagram followers automatically, consider filling Action URL (for followers) with a product URL which a discount code is inserted into.

    Have a try and see how the magic works.

  • Insert discount code into your Shopify product URL

    Do you know you can insert a discount code to your product URL so the discount applies automatically? Insert a discount code to your product URL is an easy job.

    Step 1: Create your discount code on your Shopify admin panel

    1. Click Discount on the left side menu
    2. Click Create Discount at the top right corner
    3. Follow the instruction to create the discount code

    Step 2: Form the discounted product URL

    What does work is to use the discount permalink, with a redirect. For example:

    https://your-shop-domain/discount/your-discount-code?redirect=/products/the-product-handle

    The product handle is the last part of your frontend product URL, check the following graphic.

  • Experiencing difficulty getting more Instagram followers?

    Growing your Instagram followers very slowly? Let your followers and Biobiogo help! Try “Friend Tags” on your shoppable posts today!

    Today with Biobiogo, you can setup an automation to your posts and ask your followers to tag their friends in the comments.

    Once the comment meets your requirement, the automation will send a reward to person who added the comment automatically and instantly, for example, a coupon code.

    To connect a such automation to your posts is an easy job, here is how you can do it.

    1. create a shoppable post
    2. setup an automation to do the magic
    1. Create a shoppable post

    Creating a shoppable post is very simple, we have already introduced the feature in a previous post, if you don’t how to do it click here>>

    2. SETUP an automation DO THE MAGIC

    Step 1

    As soon as having your post created, you will be prompted to setup an automation. In order to setup the rewarding automation, you will need to choose the below template.

    Step 2

    In the Trigger component, you will setup the comment keyword and the number of friends you would like your followers to tag in the comment.

    Comment matches: in this case you will input *.

    Friends tagged: the number of friends you would like your followers to tag in the comment.

    Step 3

    In the Send Private Message component, you will setup your reward message which once the comment meets the Trigger criteria. In this case you may include the coupon code in the message body, like the below image.

    Button Label is required as your your follower click on it the automation can send the Call-To-Action message.

    Step 4

    The Send Call-To-Action component, in this example, you may choose your product as the CTA which will be sent to your followers when they click on the button in the Private Message you have just set in previous step. If you have a Shopify store connected, then just simply click on the Shopify Icon to fill this component.

    Finally click on the Save Automation button then you are good to go and test.

    Important note: the automation WILL NOT respond to your own comments even it meets the trigger criteria. If you want to preform a test please use other accounts to comment on the post.

  • Create Your First Shoppable Post

    Shoppable Post is kind of post that allows your customers and audiences shop and pay right under your FB & IG feed, and there is no human effort required.

    Since Instagram does not allow us to add any links to either the posts or stories, what our audience can only do is to comment under the post or DM us to ask for links and price about the products.

    Until we have Biobiogo, we have been loosing customers because we could not respond to those comments and DM in the right time due to the time differences and the holidays.

    Said a fashion shop owner

    What Problems Shoppable Post Solves?

    A shoppable post is an Instagram or Facebook post which an automation connected to, helping you to reply to the post comments and DM the product link to commenter automatically and instantly.

    So you never worry about your customers and audiences can only see your posts and stories but not able to order the products.

    Click Here to Check the Dome >

    How Create a Shoppable Post?

    There are only few clicks to create your shoppable posts and publish to your Instagram and Facebook feeds. Here is the steps:

    1. Connect your Instagram or Facebook accounts
    2. Create your Shoppable Posts
    3. Setup the automation

    Watch a Video

    Or Continue Reading The Course

    1. Connect your Instagram or Facebook accounts

    Navigate to Automations > Overview page, you will be able to connect your Facebook Pages and Instagram accounts.

    2. Create your shoppable posts

    After connected your account, click Setup button beside your connected accounts.

    Then all your posts will be shown on one page. In this page click Create New Post.

    A dialog will be prompted which allows you to fill the post information.

    Images: if you have a Shopify store connected, click on the Shopify Icon to browse your products and all data can be filled from your Shopify store product. Otherwise you may click on the Image Icon to browse the images you are going to post.

    Post caption: if the form is filled from a Shopify product, the post caption will also be filled with your product description. Otherwise you may fill it manually.

    Watermark text: a phrase that can be append to the post images, for example Comment “shop” to order this item as you may wish your audience can easily find out how they can shop, your post will looks like the following image.

    Click Post button to publish your post.

    3. Setup the automation

    Having your post created, you need to setup an automation to respond to the comments automatically.

    As soon as your post being created, you will be prompted to choose a automation template.

    Choose one template and setup the automation.

    In this step you will have several components to setup:

    Condition: is how the automation behavior when someone comments on your post. For example you may fill *shop* in the Comment matches field as you have set Comment “shop” to order this item as the watermark text while creating the post. In this case anyone comments in the post that contains shop, the automation will respond to the comment according your setup.

    Reply To Comment: the message you would like to reply to the comments which containing shop. For example Please check your DM as the automation is going to send the product link to the person who added this comment.

    Send Call-To-Action: in this example, you may choose your product as the CTA which will be sent to the person who added the comment. If you have a Shopify store connected, then just simply click on the Shopify Icon to fill this component.

    Finally click on the Save Automation button then you are good to go and test.

    Important note:

    the automation WILL NOT respond to your own comments even it meets the conditions. If you want to preform a test you may use other accounts to comment on the post.